One of the most influential figures in camping and the outdoors over the last couple of centuries was George Washington Sears, known more commonly by his pan name; ‘Nessmuk’. He was an advocate of light weight camping and to keep the weight of equipment down he recommended carrying just three tools. Not only was his tool kit considerably more light weight than the kit carried by his contemporaries, or more accurately his contemporaries porters, but his tools allowed him to make many of the other things he needed for wilderness living. So rather than having to carry extra equipment he could make the things he needed with his simple tool kit.
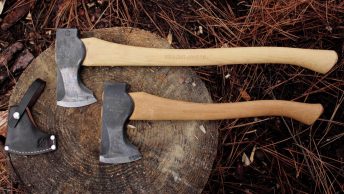
The three tools preferred by Nessmuk were a skinning knife which he exclusively used for preparing game, a small double bit hatchet which was used for all his chopping, wood splitting and heavy tasks and a simple pocket knife. He was so particular in the requirements for his tools and equipment that he commissioned his sheath knife and hatchet to be built to his specific design. He is also known to have designed canoes and tents to meet his need for light weigh equipment long before light weight camping became the norm. What is clear from what he wrote in his 1884 book Woodcraft and Camping is that it was this pocket knife that did the most work and was used for whittling and carving and all manner of simple wood work tasks.
Nessmuks skinning knife has gained a cult following and many manufacturers now produce knives of a similar design although they tend to forget his description of it as a skinning and game prep knife and build it from thick steel and put a Scandinavian grind on them, they are probably very good knives but are far from nessmuks original design requirements.
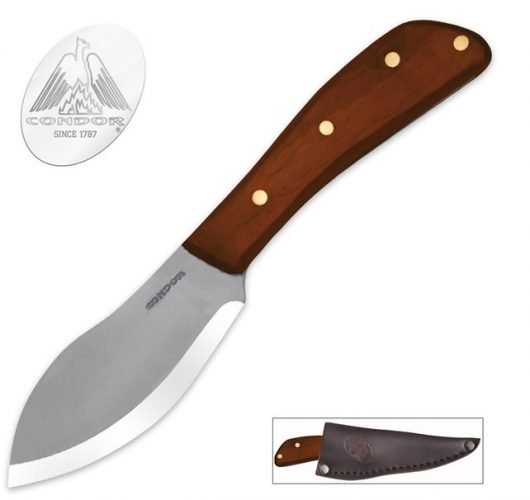
Although Nessmuk’s pocket knife was his primary knife we now tend to use fixed blade knives for almost all bushcraft tasks and have thoroughly bought into the ‘one tool option’ philosophy. There are good reasons for choosing fixed blade knives over folders as fixed blades are certainly stronger and that strength facilitates a more confident carving style, there are even plenty of specialist knives designed just for whittling and carving available from manufacturers such as Mora and Svord.
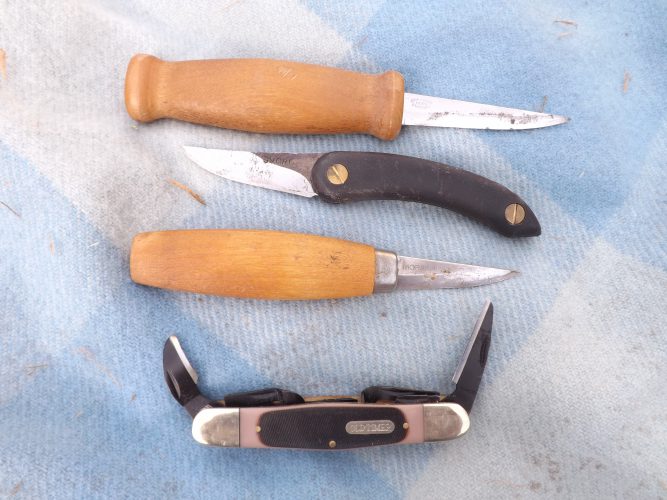
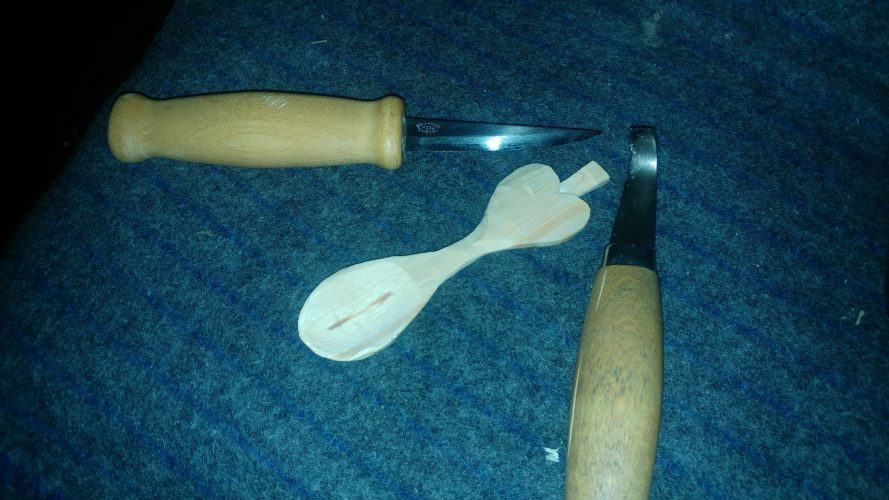
While pocket knives might not be as popular for whittling nowadays as people seem to prefer multi purpose fixed blade bushcraft knives or for more detailed carving and whittling the purpose made knives pictured above are very reasonably priced. Purpose made whittling knives come in all shapes and sizes to help make the job of carving and whittling easier and more pleasant. They are generally shorter than your average bushcraft knife maybe only two inches and will also tend to have thinner, shallower blades. They are wonderful to work with but while you are doing a bit of casual bushcrafting you don’t want to be carrying around a hundred weight of specialist wood working knives and gouges with you. So in keeping with the ethos of bushcraft and a sensible every day carry you could just use your edc knife for whittling instead of these specialised tools.
As your EDC knife is with you all the time it, unlike a fixed blade bushcraft or survival knife or specialist whittling tools, will be available to you in an emergency or in a moment of free time when you fancy doing a bit of whittling the knife you are most likely to have on you is your ‘edc’ knife. The convenience of a knife that can fold and safely be carried in a pocket can’t be underestimated, fixed blade knives aren’t as easy to carry as folders and a lot of smaller fixed blades don’t have a handle large enough to be gripped with the whole hand, this makes holding those smaller fixed blades difficult especially for tasks that require dexterity like whittling.
If you are used to carrying a pocket knife on you at all times as part of your ‘edc’ system they become hard to forget. Once you are in the habit of carrying one you will always have a knife on hand for emergencies and in moments of free time for some recreational whittling. Another advantage of carrying a simple folding pocket knife is that they are not obvious or intimidating to everyone you meet, bearing in mind that not everyone will share your enthusiasm for knives, the outdoors and whittling.
Once upon a time NOT having a pocket knife on you was entirely unheard of and a time when birthday and Christmas gifts would inevitably have been homemade whittled toys that would have delighted children for centuries, a time before plastic and mass production came along. At a more practical level simple everyday items like clothes pegs, cooking skewers, tent pegs, tool handles and even simple tools would all have been made by hand with little more than a pocket knife. Having an edc knife gives you an opportunity to return to those simpler times long before cell phone games, text messages and social media filled every second of our free time and maybe you will even be able to impress a few people with the trinkets you carve.
Choosing the Best EDC Knife for Whittling

The Victorinox Hunter is a great EDC knife. Not only does it feature a strong locking blade which is great for whittling but it also has one of the largest saws available on a folding pocket knife which can be very useful for speeding up your various craft projects and will save you from having to ‘nibble’ your way around pieces of wood with the blade that you want to cut to size and use for your craft projects. It is a great choice for whittling and wood craft.
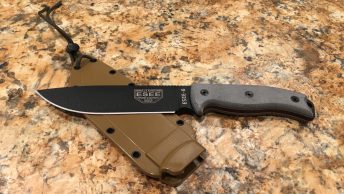
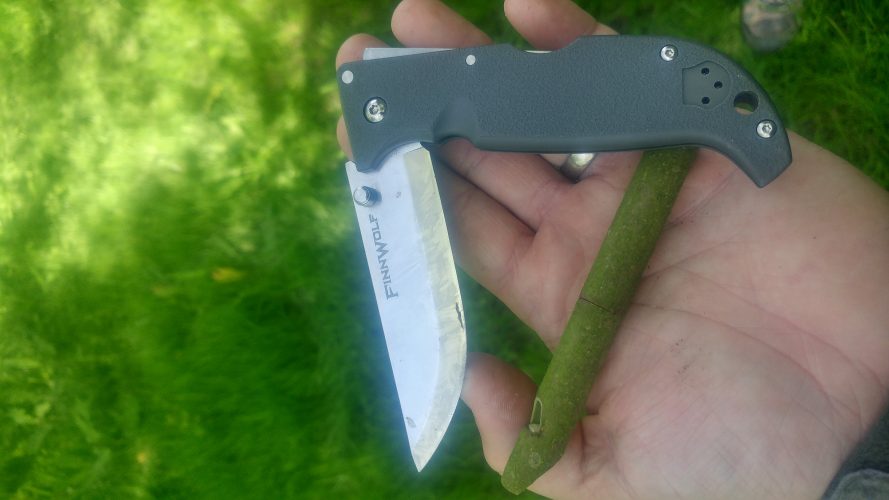
Another good choice is the Cold Steel FinnWolf which is a little more robust, doesn’t feature a saw but has a Scandinavian grind which is probably the best grind for woodworking. You will find it particularly effective as you undertake your whittling projects. Any of the options from the edc knife post will be suitable for your whittling but these two folders are my favorite to use for whittling tasks. If you desperately want a fixed blade for whittling the ENZO necker would be a perfect fixed blade edc whittling knife but these folders are more discreet to carry.
From here on I’ll split this guide into two sections; utility whittling which will cover the skills of whittling useful items which you might need in survival or wilderness living scenarios and recreational whittling which will focus on decorative or artistic whittling for entertainment or to produce craft items as gifts or curios.
Recreational and Traditional Carving
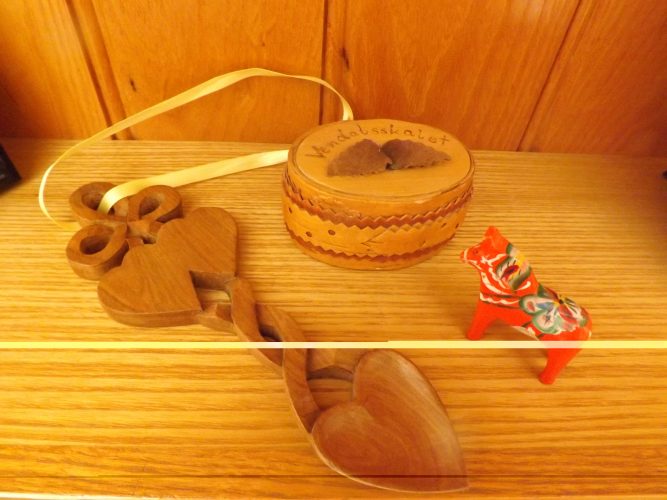
Most cultures have traditional craft items that are still made today; ‘Dalar Häst’ from central Sweden carved from willow and painted beautifully. Kuksa mugs from Scandinavia. Love spoons from Wales and a whole range of other wooden craft from all over the world.
The culture of whittling and hand crafts from all around the world can be very inspiring for the aspiring whittler and I try to learn the skills and techniques that I have seen practiced on my travels and study of bushcraft from around the world.
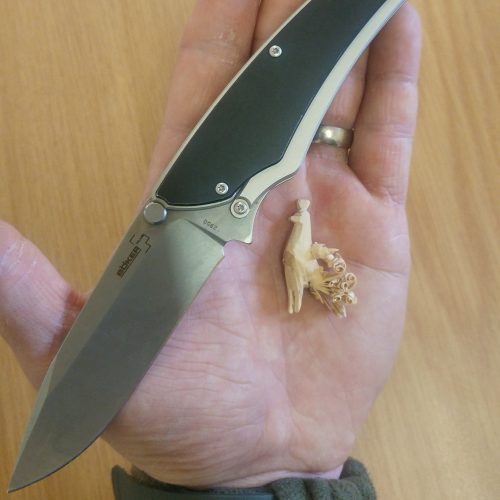
One of the simplest whittling projects to start with is carving a simple bird, with a bit of practice you can make these in just a few minutes and they make great gifts, my children love them and will often paint them. All you need is a forked stick, this should be of relatively dry wood and still have the bark on.

Position your stick so it look like a letter ‘y’ and whittle away the lower portion of the stick which will become the legs of your bird. Now you can progress to the head which first should be whittled flat so that you can carve into it the profile of a cockerel with it’s beak, comb and wattles.

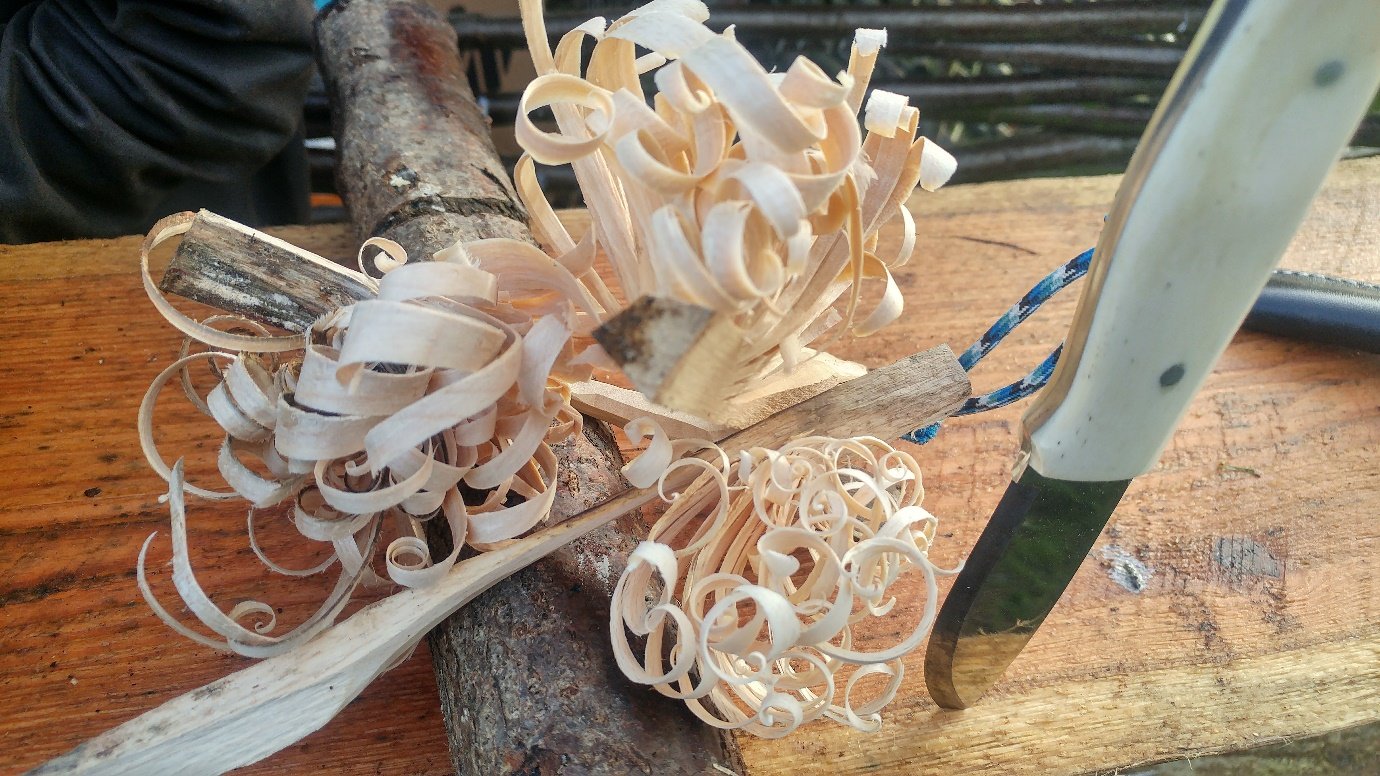
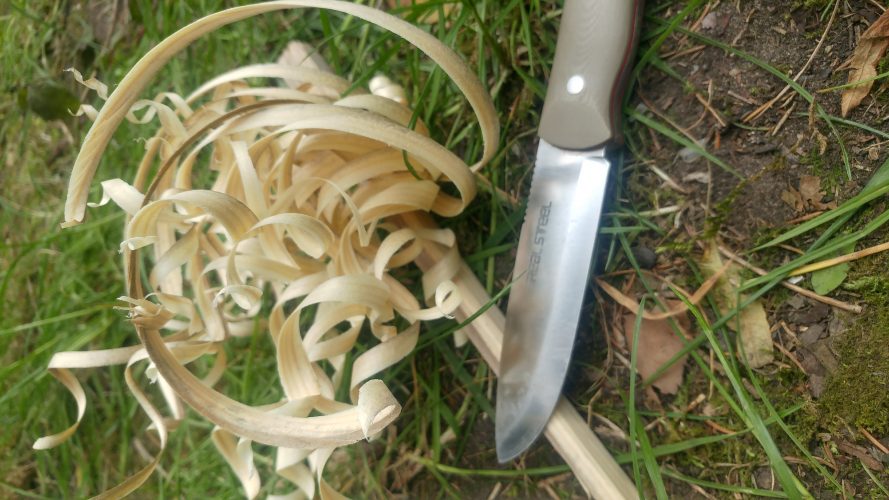
A very sharp knife and careful control of the blade is required for this. The very last thing to do is turn the remaining fork of the stick into a tail by carefully whittling the underside of the stick into a a mass of fine curls. These curls will become the tail, for a bit of variety you can turn the stick the other way up to make a pheasant or peacock instead of a cockerel.
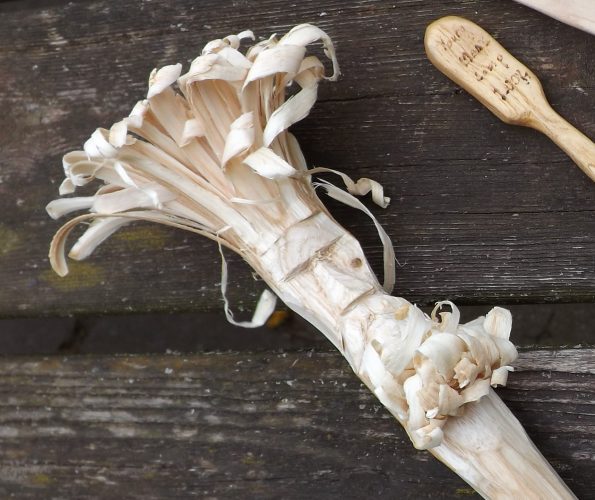
If you can master the simple task of carving a bird you are ready to move onto more complex decorative tasks. Decorative spoons are fairly straightforward but to make the best of them you may need to use a specialist carving tool like a crooked knife.
With practice your simple decorative spoons can become more and more elaborate. To carve the ball in cage feature of the spoon below you will need to scribe out the balls that you intend to remain inside the cage and then carefully whittle around them, you will need to gradually work your way through the piece of wood and will need to work from multiple angles from all four sides of the piece of wood. As you work towards the centre you will clear a hole all the way through the wood and will be able to shape the balls. They will remain connected to the bars of the cage until the last minute. Be very careful as you get closer to finishing the balls that you don’t cut through the cage. The last thing to do will be to carefully separate the ball from the cage and do a little more shaping to get the balls as close to spherical as possible so that they can move smoothly inside the cage. Do make sure though that you don’t whittle them so small and smooth that they fall out of the cage though.

This spoon which features a ‘ball in a cage’ decoration really requires a sharply pointed knife to make it successfully. If you are to whittle the holes required to make a ball in a cage or pierce holes in a piece of wood for any number of practical purposes you must have a sharply pointed and razor sharp knife. Some knives just aren’t going to be up to this task if they have fairly round nosed tips. It sounds obvious that a knife should be pointy but some knives that might be designed for skinning or which have ‘tanto’ style blades may be sharp but often aren’t pointy. You don’t however use the point of your knife to drill with to create this affect as might be assumed.
Drilling with the point of a knife is a good way to damage it’s edge and to split the wood you are working on. Instead a hole should be scribed with the point of the knife and then carefully chipped and whittled out from both sides. It’s easiest to start this as a square or rectangle and then whittle it round afterwards. This is however one of the techniques which seems to invite the development of particularly dangerous habits. I have lost count of the number of times I have spotted someone using their thigh or the palm of their hand to lean one while they are carving holes or starting of their ball in a cage with their knife, DON’T EVER DO THIS!! You will eventually slip or what you are working on will split and you will stab yourself in the hand or even worse in the thigh while applying significant pressure to your knife and it will end in disaster.
A ball in a cage can be an interesting project on it’s own and really shows quite a high standard of whittling skill. Simple carved wooden faces are another fun carving project which can be as simple or as complicated as you want to make them.
The ‘feathered’ beard and hair of this wooden face is made in the same way as the tail of your whittled cockerel and is also made in the same way as feather sticks for fire lighting. Being able to make feather sticks whether with a fixed blade survival knife or a folding edc knife is a very important survival skill.
Utility Whittling
Using the same technique as carving a ball in cage except on thinner wood, which makes it easier, you can now try making buttons, net needles, a hole to thread your bow string for friction fire lighting, making a whistle or making a trigger for a primitive trap.

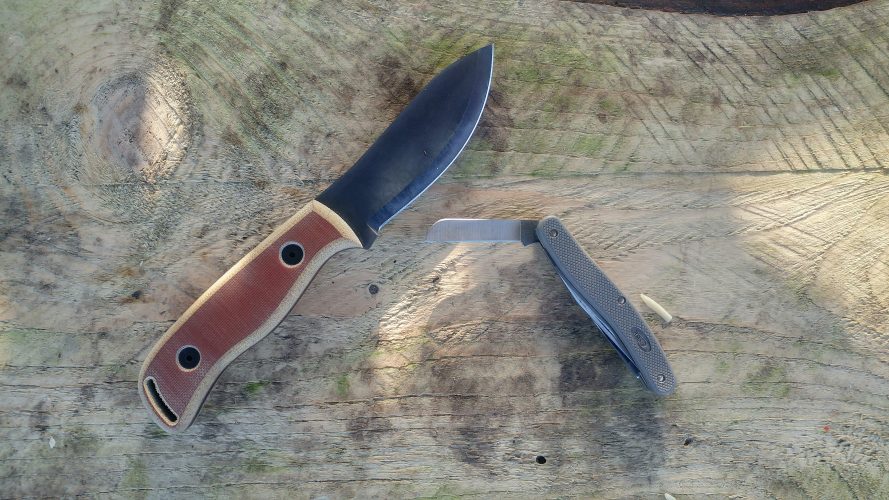
Making a net needle is an acid test of a knife, well known bushcraft and survival instructor Mors Kochanski has said that the perfect survival knife is a pry bar that works wood really well and that whether or not you can carve a net needle with it is a deciding factor in its suitability as a survival knife. Either of the pocket knives pictures here will be suitable for these tasks.

Try Sticks
A try stick is not really useful in and of itself but making one is excellent practice of whittling skills that are useful. The idea of a try stick came again from Mors Kochanski who devised the exercise as a practice exercise and a test of knife skills for trainee instructors.
A try stick will feature all manner of notches and features which might not be useful all together but which independently could be very useful. These notches might be used for hanging pots over the fire, joining logs together, stripping roots, stringing a bow or making primitive traps. They are great practice not to mention very satisfying to make.

Whistles
Making whistles is great fun but the simplest method can only be used in Summer, select a piece of willow or sycamore about as thick as your index finger. Cut it to the length you want, somewhere between three and six inches and make sure it has as few knots or leaf buds as possible. Cut the mouth piece to shape first and then make a small triangular cut in the upper surface of the wood opposite the curve of the mouth piece.
Now score around the bark about two inches down from the notch you have cut. The bark can now be carefully loosened by bruising it lightly with the handle of your knife or a stick, be very careful at this stage not to split the bark. Once the bark is bruised you will be able to twist it, you will hear a pop when it loosens, and you should be able to slip it off completely exposing the wood underneath. Now you can carve a thin sliver off the top surface of the whistle between the mouth piece and the notch you cut through the bark and then form the sound chamber by carving from the notch toward the remaining bark. You should end up creating a hollow chamber that doesn’t quite reach as far as the remaining bark. Now slip the bark back on and a gentle blow should give you a piercing whistle. These are great fun or potentially a useful emergency signal whistle.
As fun as these whistles are to make they really can only be made during Spring and Summer at the time when the sap is up in the trees. In Autumn and Winter when the trees are dormant you won’t be able to separate the bark from the wood and will have to adopt a different strategy if you want to make a whistle. You could try making a kazoo out of a split stick and a leaf or elder, which is naturally hollow, and can be used to make a whistle all year round.
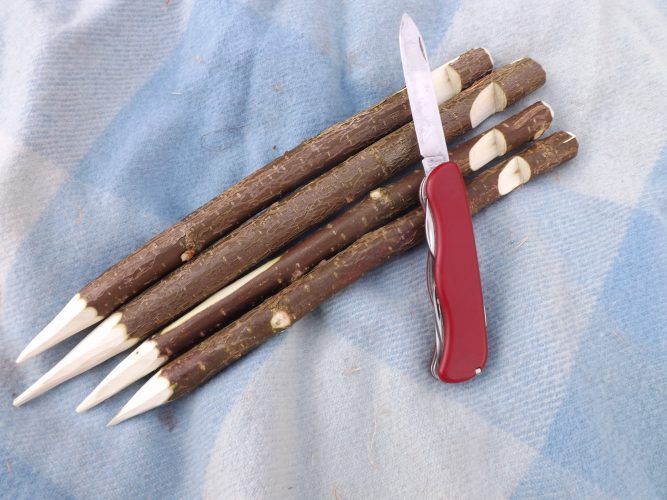
Tent pegs
While carrying steel or aluminium tent pegs are the norm nowadays they are easy to forget, loose, bend or break so carving tent pegs can be very useful. They are very simple to make and can either be made from straight sticks or from split wood. While an edc pocket knife is absolutely fine for carving the notches, round end and point on a tent peg they are not stout or robust enough for batoning and splitting wood for more refined tent pegs. The saw on the victorinox hunter is perfect for cutting hazel rods to length as tent pegs and the notches and points are easy enough to carve with the blade. It is important to carve the top surface of the peg into a rough dome and this prevents the peg from splitting as it is driven into the ground.
So whether you are whittling for fun or because you have forgotten your tent pegs or spoon on a camping trip your edc knife will be a sufficient to make those items. Being able to make almost anything with just a pocket knife will put you up there in terms of skill with the mountain men and trappers of yesteryear and will be a very satisfying and valuable skill.

Geoff has a background as a professional game and deer manager. He has put his years of experience to good use and now lectures at Hartpury College, one of the UK’s leading providers of land-based education.
He specializes in training game and wildlife managers who will work in professional game management, conservation, and other outdoor professions. He's been teaching at colleges for eight years and, in that time, has worked at some of the most prestigious land-based colleges in Britain.